
Building a backyard office, the build and cost breakdown
I wrote up my experience building a backyard office because I wish I had come across more articles like this when planning my build. I hope this post helps you on your journey:
I have worked remotely for most of my career and always dreamed of having my own backyard office. A place on my property but completely separate from my home. Until this year, that idea seemed too unnecessary… then our baby grew into a toddler. We have a small house in Portland. We love it, and it works for us, but it became clear that it could use more space. My wife and I briefly considered buying a new home but decided to stay. But for us to stay, I needed a better working environment. Our space is small. The bedrooms and living room are very close together. It gets loud with our toddler at home with my wife during the day, and listening to one half of a Zoom call wasn’t music to my partner’s ears. I had tried coworking spaces but didn’t love the vibe or the idea of spending hours in a phone booth. I don’t see myself returning to a local office in Portland, so we decided to invest in a backyard office. It was way cheaper than buying a new home.
I looked into many options. My budget’s two most viable paths were an Autonomous.ai prefab office Pod or building an office by utilizing a shed frame. The Autonomous pods are gorgeous and come prewired with electricity. You just plug them into an outlet in your house. But I wanted proper heating and air conditioning. I had spent hot summers working with a portable AC unit blasting in the background, and it just wasn’t for me. Their base starts at $16.5k; adding $5k shipping, paying someone to assemble it (I didn’t have time to DIY), and adding a mini-split HVAC system, and we were getting closer to $30k. It was not bad, but it was more than I wanted to spend, not knowing how long we plan on staying in our house.
Deciding against an Autonomous Pod left me with the shed conversion option. This was appealing for a couple of reasons.
- Cost. I thought I could do it for ~$15k-$20k.
- Lighting. If I went this route, I would have much more control over the layout and lighting, which is very appealing for Portland winters.
Planning, hiring contractors, and the build
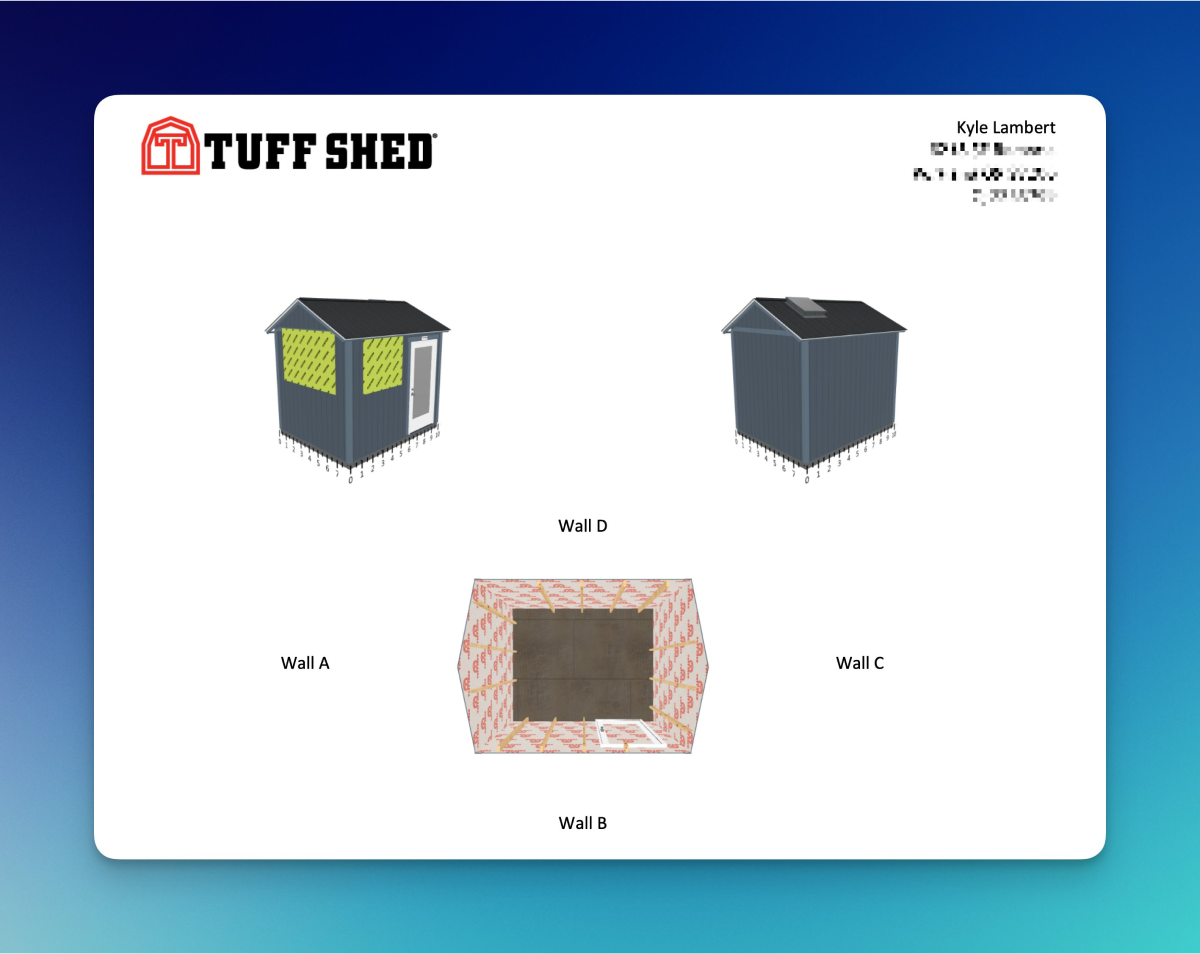
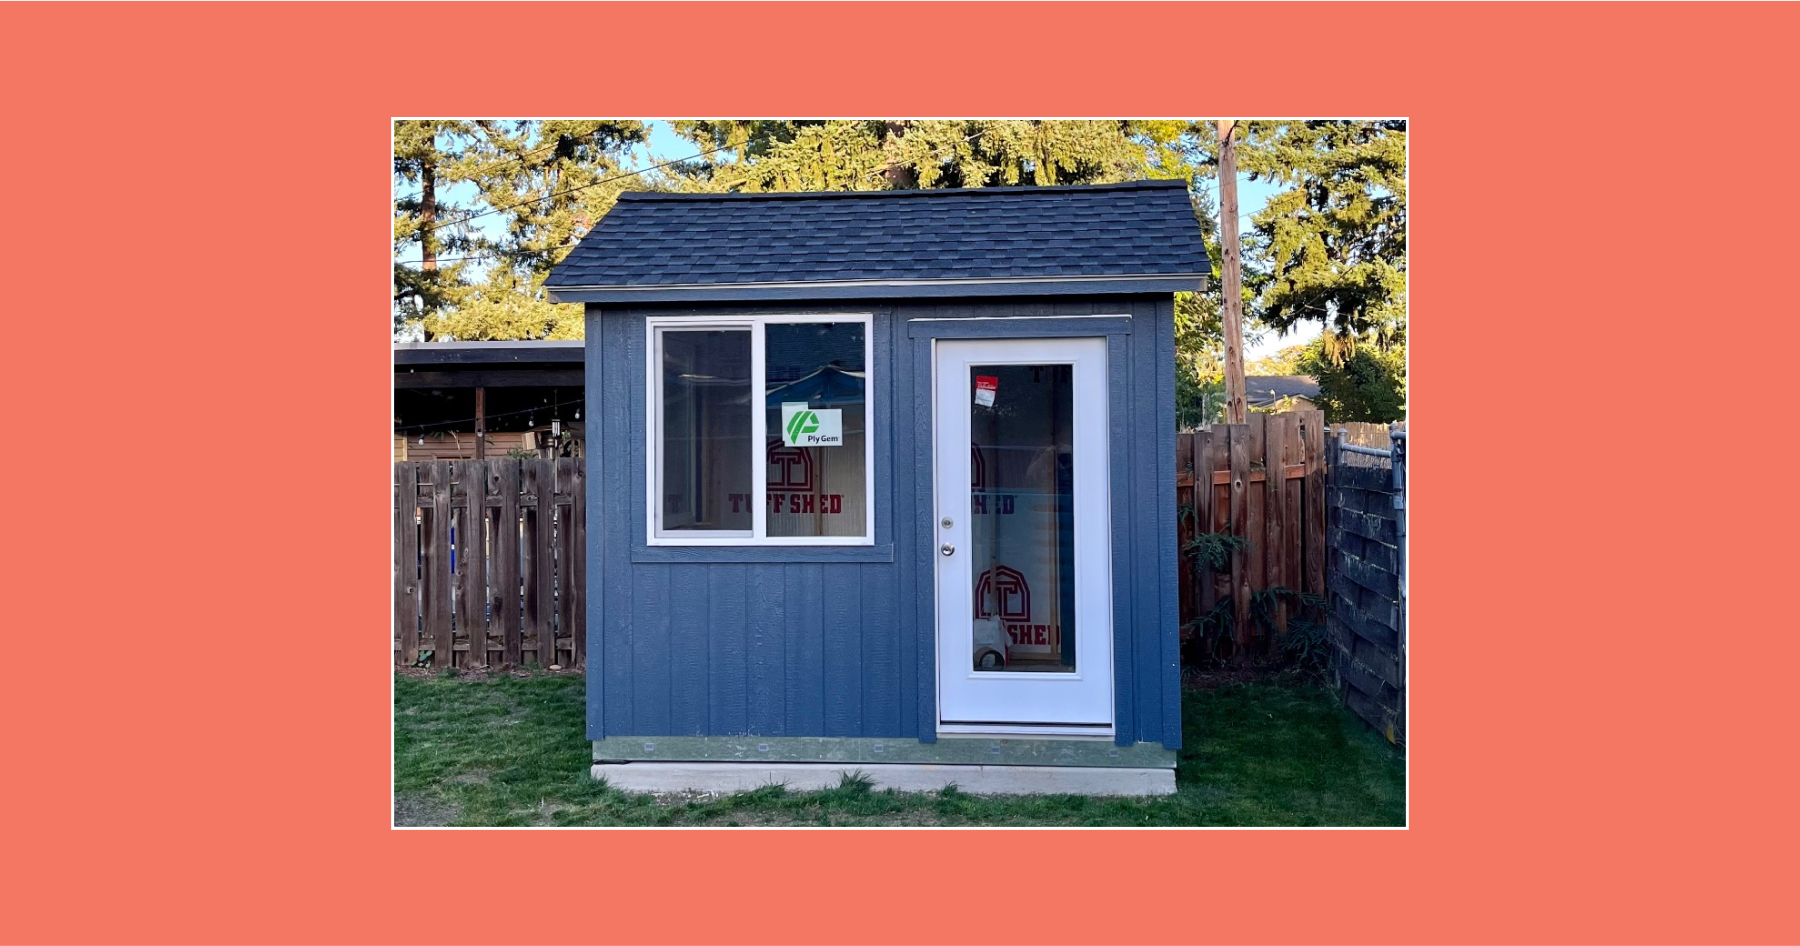
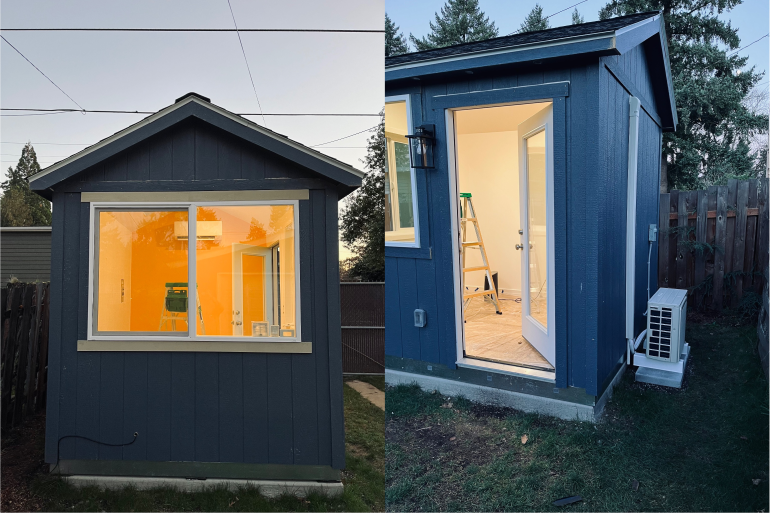
I decided on using Tuff Shed for the main frame. I was able to design and configure my structure using their online designer. They also have a local showroom in town, so I walked through some models to get an idea of what I wanted. I originally wanted their studio shed model, but after seeing it in person, I decided against it. The great thing about their online design tool is it lets you build a quote on the spot for exactly how much it will cost. The windows Tuff Shed offers weren’t as large as I wanted, so I worked with their team to rough out larger openings for windows that I purchased separately.
I read online about people wishing they had gone bigger with their shed or office. I went with a smaller size 8 feet by 10 feet, it is cozy and sure I do wish it was bigger, but we also have a small backyard, and I really didn’t want to sacrifice more space in the yard than I had to. I measured off an 8 by 10-foot space in one of the rooms in our house and hung some blankets to get an idea of how the space would feel, and I decided 8’ by 10’ would work.
I went with the Premier Pro Tall Ranch shed. This allowed me to have tall ceilings, making the small space feel bigger. I settled on a fully lit windowed door, added a small skylight, and roughed out 2 large windows (6 by 4 feet and 4 by 4 feet). I added a ridge vent and house wrap.
Once I had the frame configured, I went to order it but realized I needed to have a foundation ready before they could schedule the build. I wanted a concrete pad, and they require 3 weeks for the concrete to dry before they will install. So, I hired a concrete contractor.
The shed installation went smoothly. Tuff Shed prefabricates the sheds per order in a local warehouse, so installation of my shed only took about 5 hours. I had an issue; one of the rough openings of the windows was too small, but they quickly sent someone to expand and reframe the area for me.
I ordered the windows separately from Home Depot, and to save a little money, I decided to install them myself with one of my friends. Hanging windows seems intimidating, but after some research and YouTube videos, I realized the process was quite simple if you take time and adequately prep the weatherproof window. This saved me about $700.
Electrical
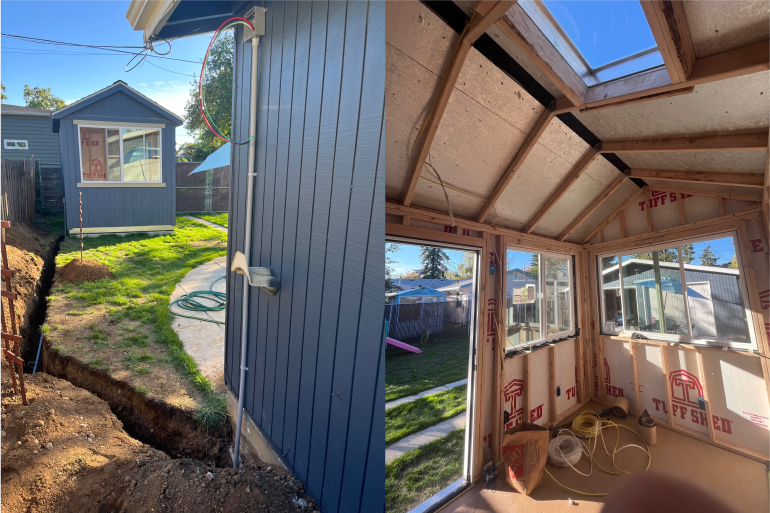
Once the windows were installed, it was time to run electricity. Our main electrical panel was redone a couple of years ago when we bought and renovated our home, so we have plenty of space to run more power out of our existing panel. I hired an electrician who ran 60 amps out to the shed. They dug a trench to run the power legally, wired up the shed with 4 outlets, LED lights, and a disconnect for a mini-split HVAC unit, and handled all the permitting.
Once the electrical passed permit inspection, I filled in the trench halfway (apparently, you don’t want a larger power supply and ethernet line running too closely together) and ran a ground-rated Ethernet cable out to the office. Fast internet was a must.
Note: In Portland, I didn’t need a permit for the building because it was under the size threshold, but I did need an electrical permit. Check your local jurisdictions.
Insulation, drywall, flooring and trim
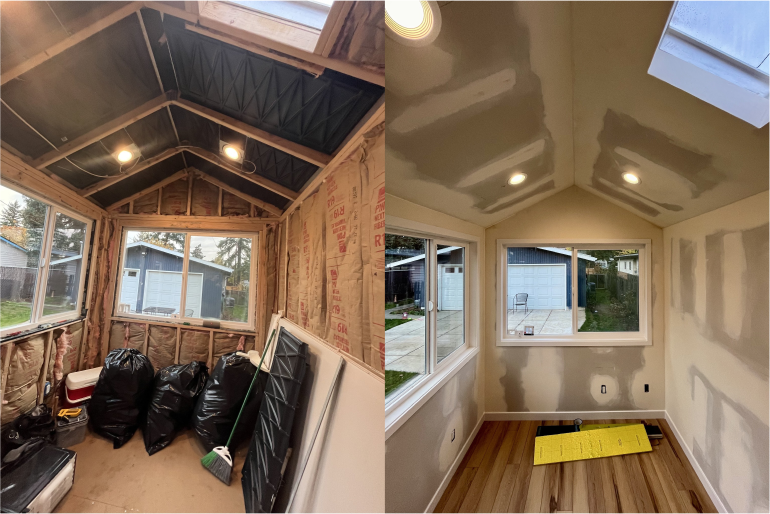
I was planning on insulting the office myself and hiring a drywall contractor to do the drywall, install the flooring, and trim myself, but I realized I have a toddler and limited free time. I don’t have time for this. So, I found a contractor to do all of that for me.
I installed soffit vents myself to allow airflow from the roof to prevent moisture buildup and had my contractor install rafter vents.
I went with a Smartcore Luxury Vinyl plank flooring and a Smartcore premium foam flooring underlayment. I am definitely happy with both choices.
Heating and Air
Finally, it was time to install AC. I got a ton of quotes for installing a mini split. They ranged from $4-$7k, which was higher than I expected after researching the cost of a quality small unit and knowing this would be a tiny job for an HVAC contractor, especially because I had my electrician prewire the electrical. I was considering installing a DIY system (Mr. Cool DIY system with pre-charged AC lines), But found an HVAC contractor who would install a system for a much lower price than the other quotes I received (and he had great reviews on Thumbtack). In the end, I got a Daikin Mini-split, a common system with many replacement parts. The installation took about 5 hours, and my tech did a great job. I am glad I researched and got a lot of quotes for this one.
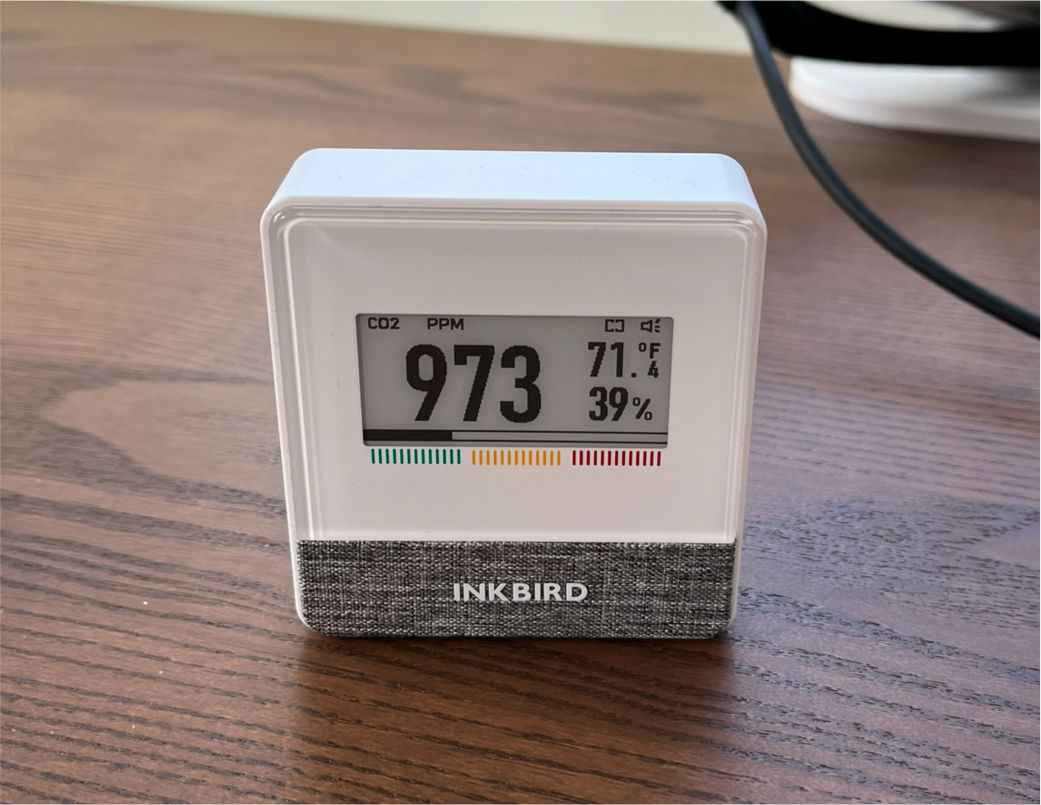
One thing I did buy was an INKBIRD CO2 monitor. I highly recommend one if you are working in a small space. I wanted to read how much CO2 is in the air because I built this as a sealed space. And it’s now clear I need to install an HRV or, ERV, or exhaust ventilation fan; for now, I just crack a window when CO2 levels get higher, but I’ll be addressing this soon.
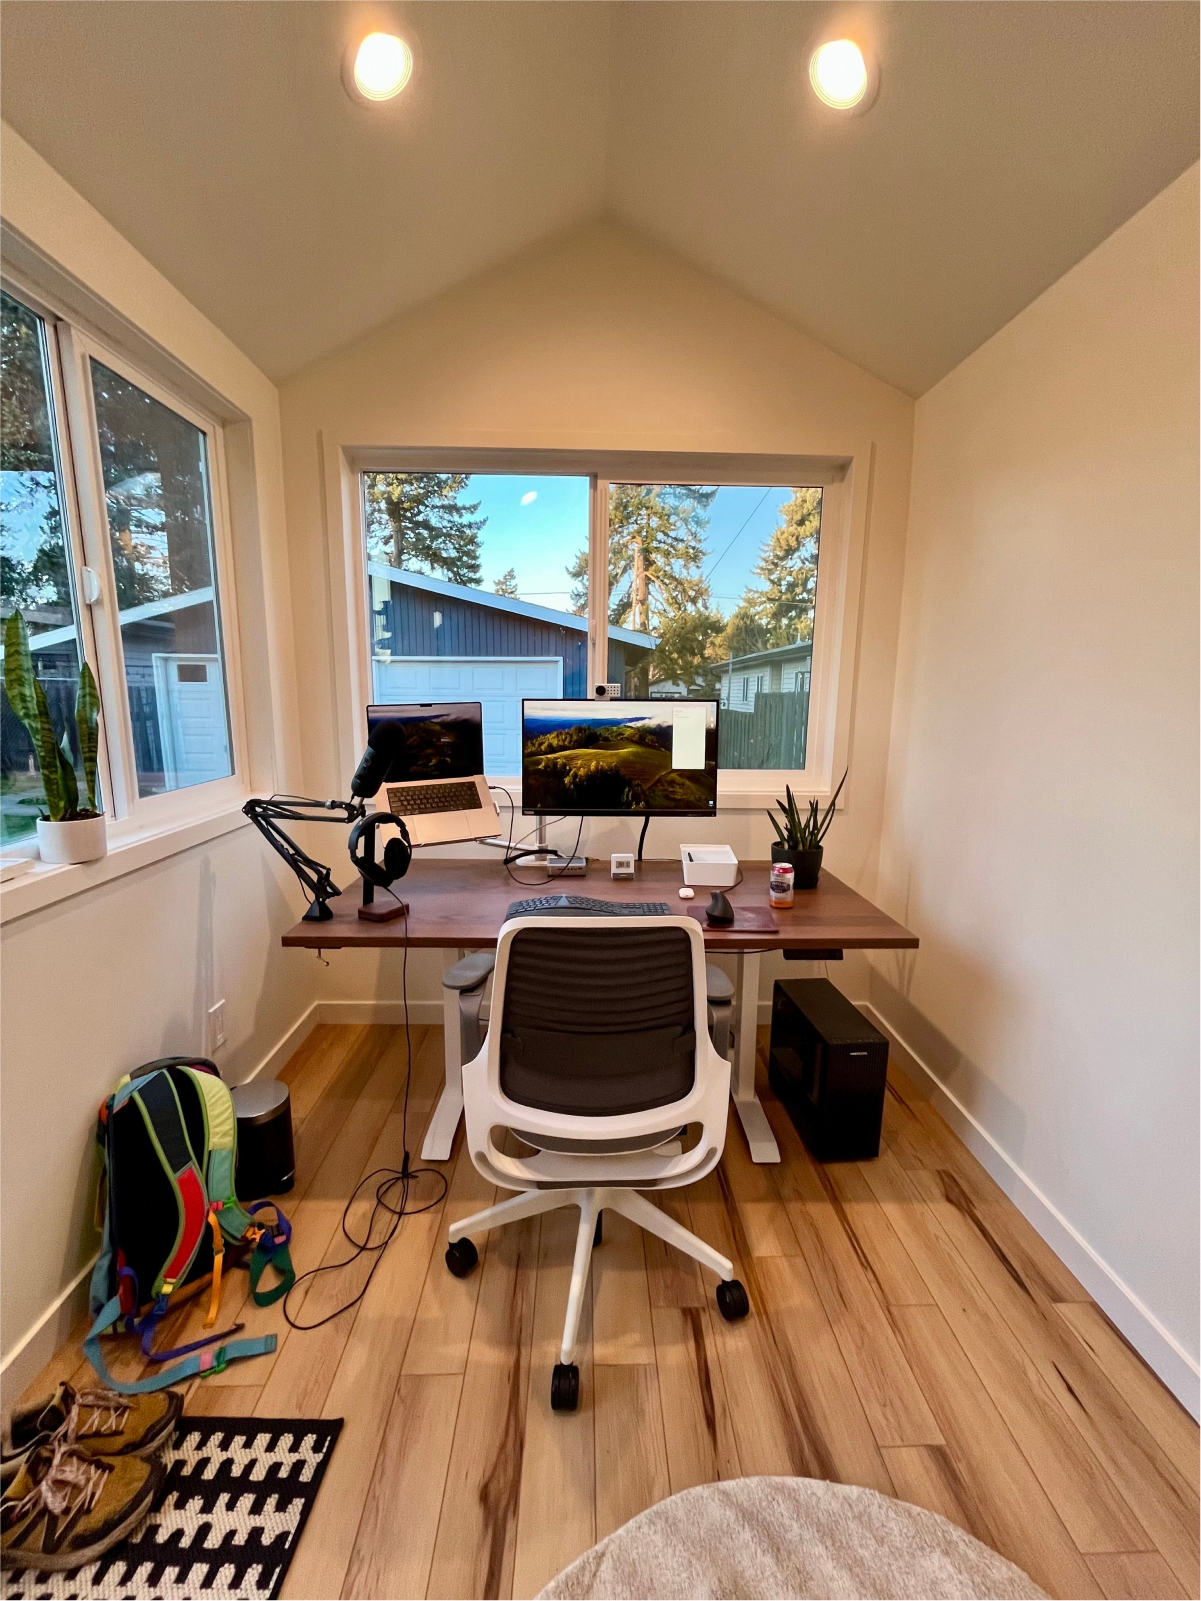
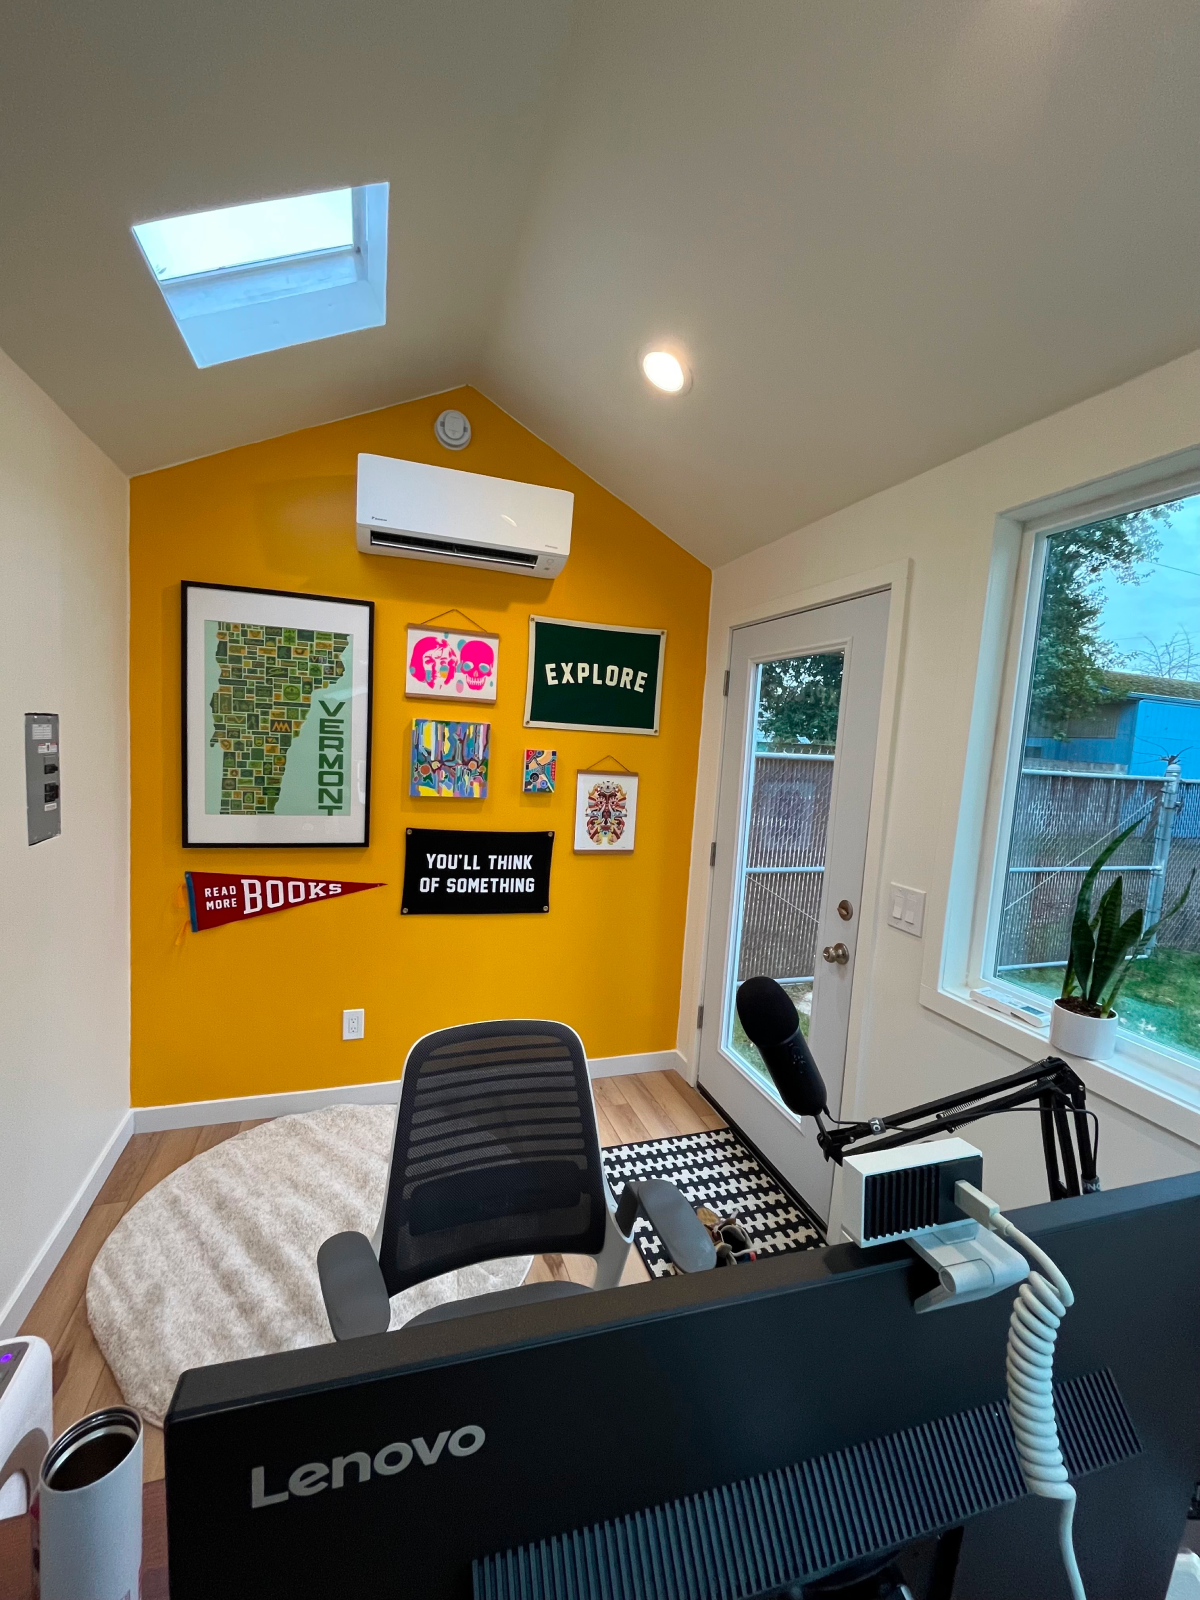
The final product
Cost and project breakdown
Overall, I am super happy with my space, and I came in within my planned budget. I could have saved some money by doing more of the work myself, being okay with a space heater and window/portable AC option, and using a gravel foundation, but these were areas I decided to spend money on.
Here is the complete cost breakdown of my office build:
Things I am glad I did
- Buying larger windows than what Tuff Shed offers. I would be much less satisfied if I hadn’t done the extra work to get large windows. I have seen many people shed conversions using the standard window options. In my opinion, this is the most significant oversight people make; with smaller windows my office would feel like a shed.
- Deeply consider where the structure will sit, which direction it will face, how the sun will play with this and the window layout, and where I wanted my desk to face. In small spaces, you should make very intentional choices.
- Use Thumbtack to find contractors. This made finding great people relatively easy.
- Do the work to get multiple quotes. The first electrician I talked to quoted me double what the electrician I went with did.
- Go with smaller contractors. 1-person shops are fantastic; many do great work and are cheaper than larger teams because they have lower overhead. This goes for electricians, HVAC, and more.
- Install more outlets than you think you need. It was a small space, so I don’t need a ton of outlets, but I am already happy I installed 4 instead of 2.
- Running ethernet hardwired internet.
I am stoked with my office. I would much rather hire a general contractor or company that builds ADUs to handle this for me. Managing this was a ton of work, and after a house renovation, I don’t love these projects. But I got an office I really like for under $20k; if I hired a company to handle everything for me, I was looking at $40-$50k. That wasn’t the path for me this time around.